Setting up an Azure Tenant
Go to https://aad.portal.azure.com
-
Login to your tenant (that you are an administrator of)
-
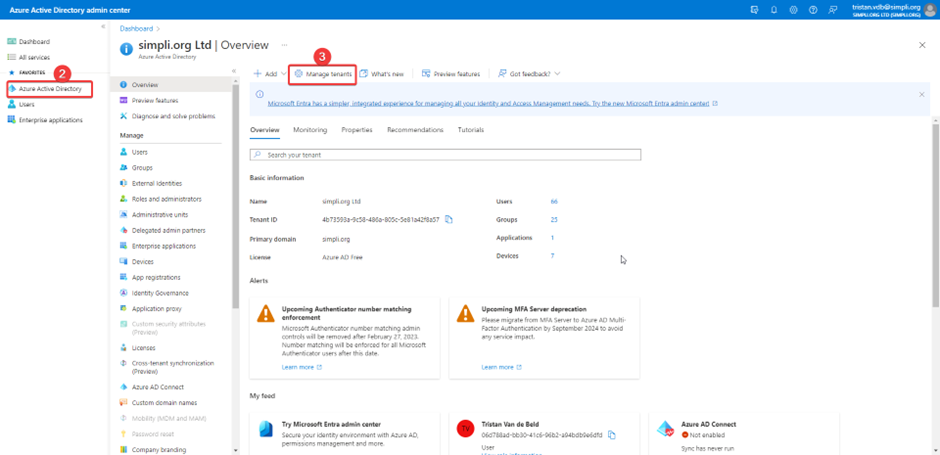
Go to the Azure Active Directory tab
-
Click on Manage Tenants
- Click Create
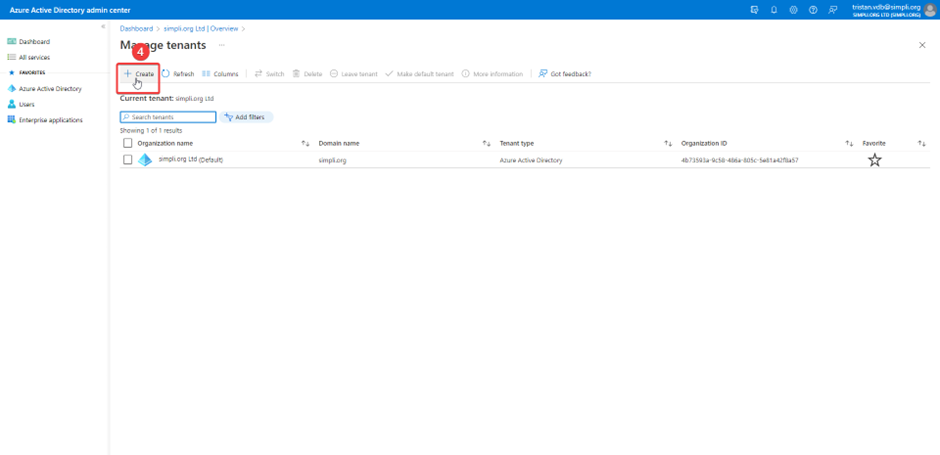
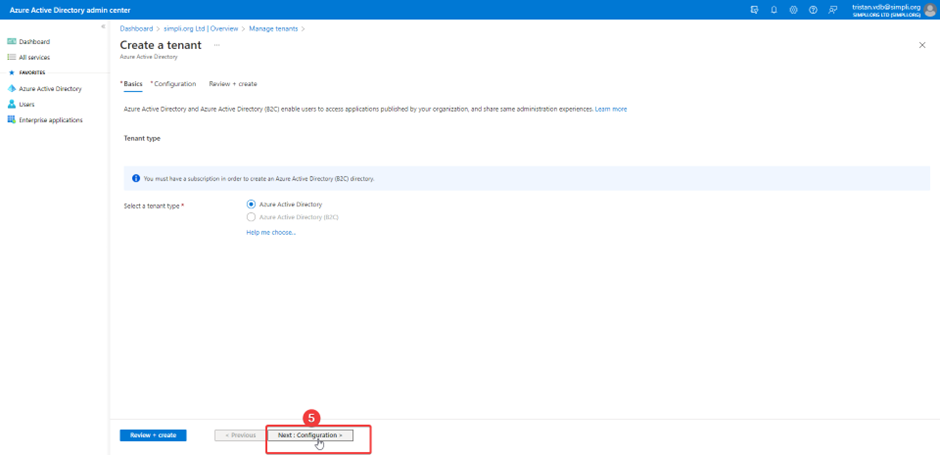
- Select Azure Active Directory - This is a stand alone tenant - NOT a sub tenant under your current one
-
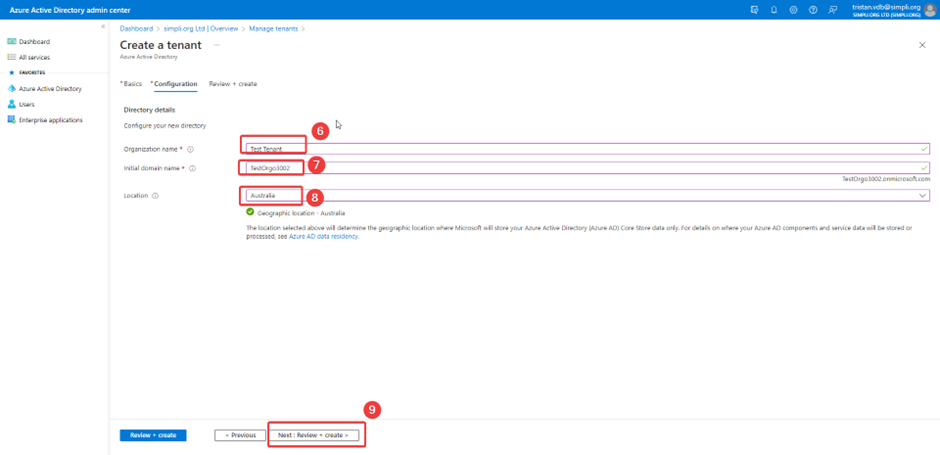
Fill out Organization name, Initial domain (Can not have spaces) name and location -
-
(Please make sure you select the correct country for location)
-
(Please make sure your Initial domain name is similar or matches if possible to your organization name)
-
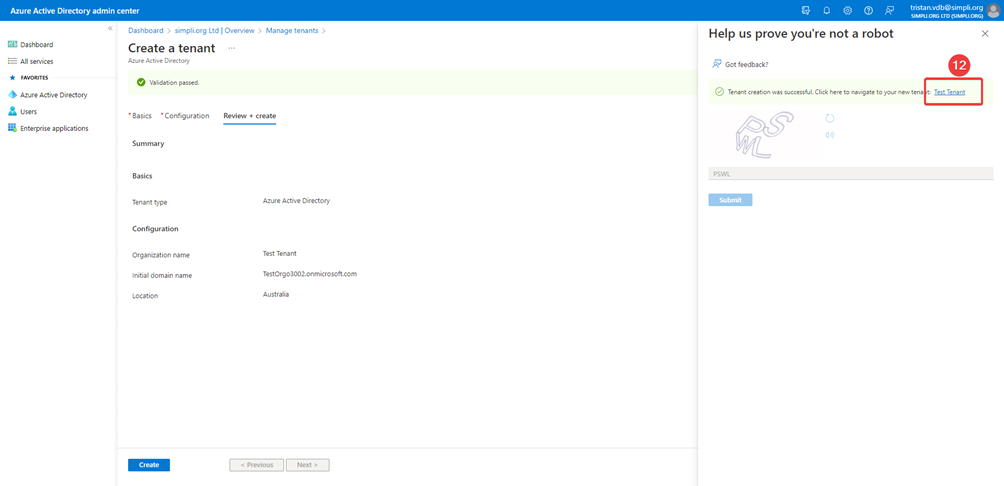
Then click review and create
- Then click create

- Fill out the captcha (This may take a few minutes)

- Once tenant was successfully created navigate to your tenant
- Click on the 3 lines
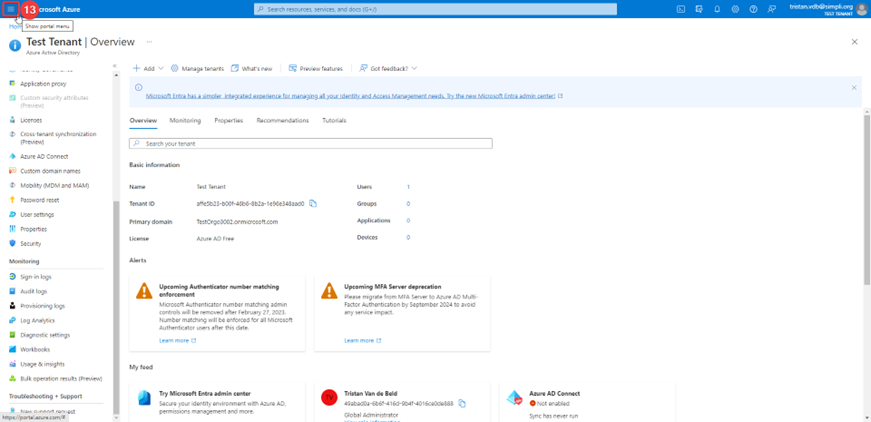
- Click on azure active directory
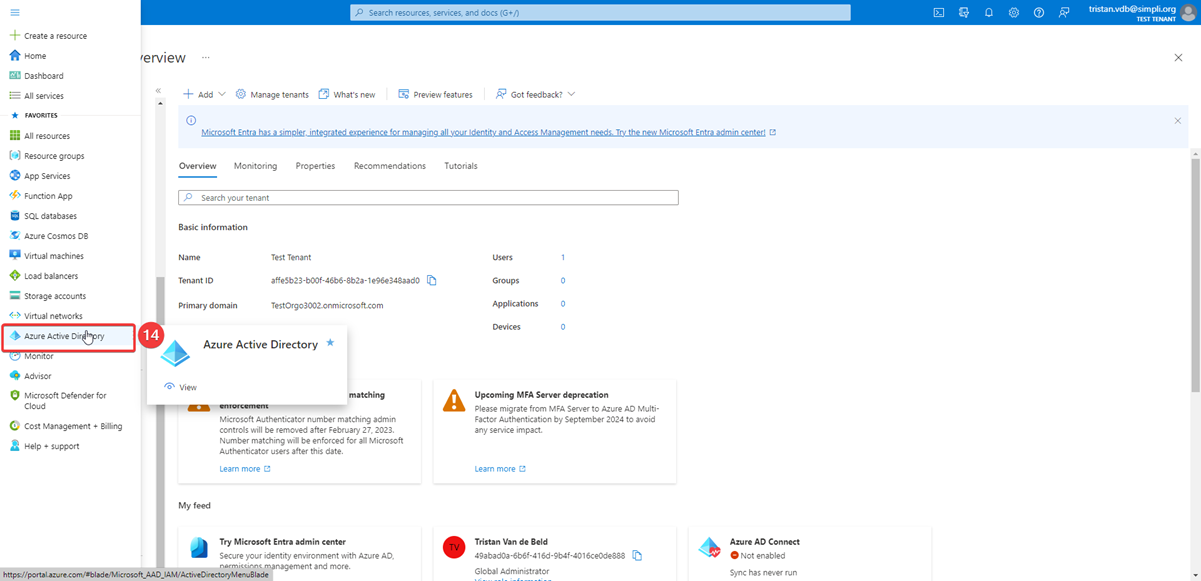
- Click on users

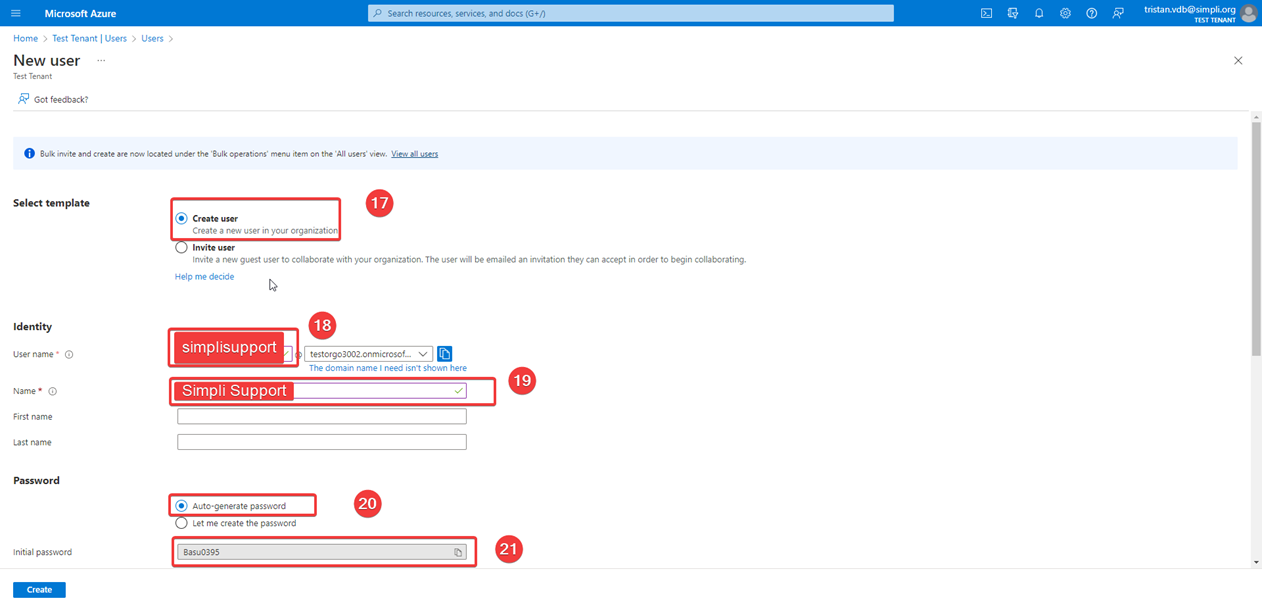
- Create a new user

-
Click on user coin in top right and click add another account
-
Set the username to “SimpliSupport” (Save your user name)
-
Set the name to “Simpli Support”
-
Select Auto-generate Password
-
Copy the password
-
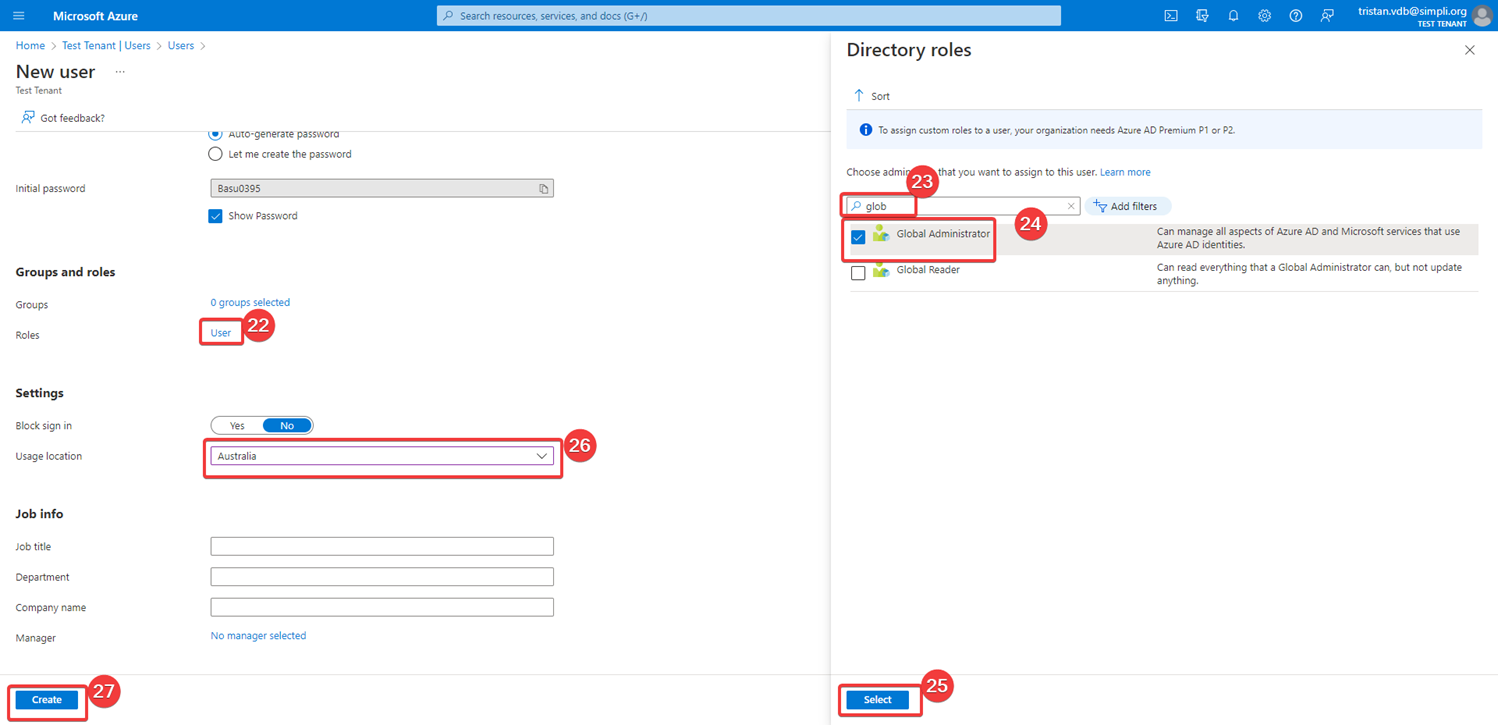
Click on User
-
Search “Global Administrator”
-
Select “Global Administrator”
-
Click select
-
Change usage location to Australia
-
Click create
-
Click on the user token in the top right
-
Click sign in with a different account

- Click on the top 3 lines in the top left corner
- Click on Azure Active Directory
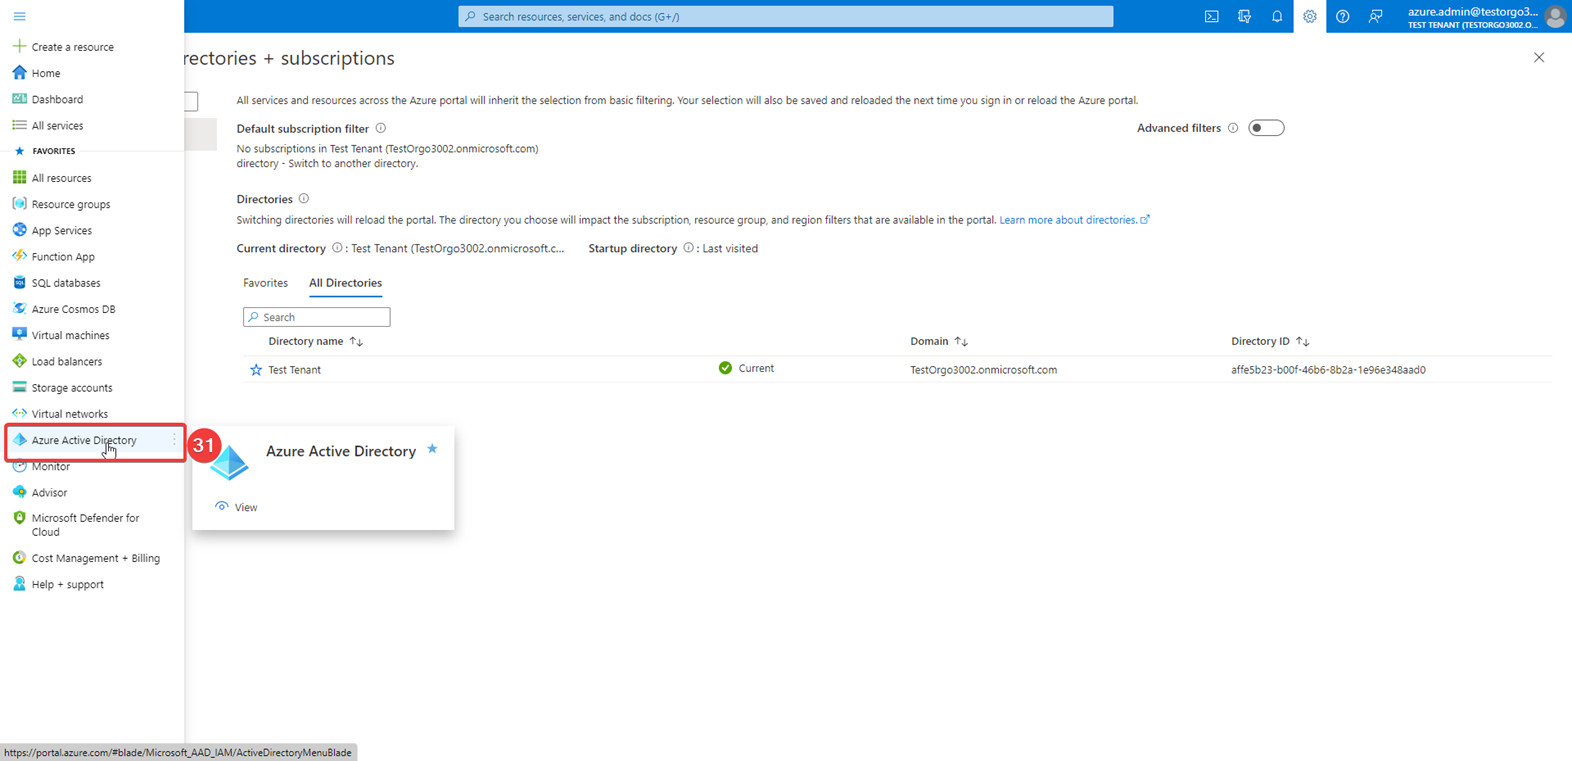
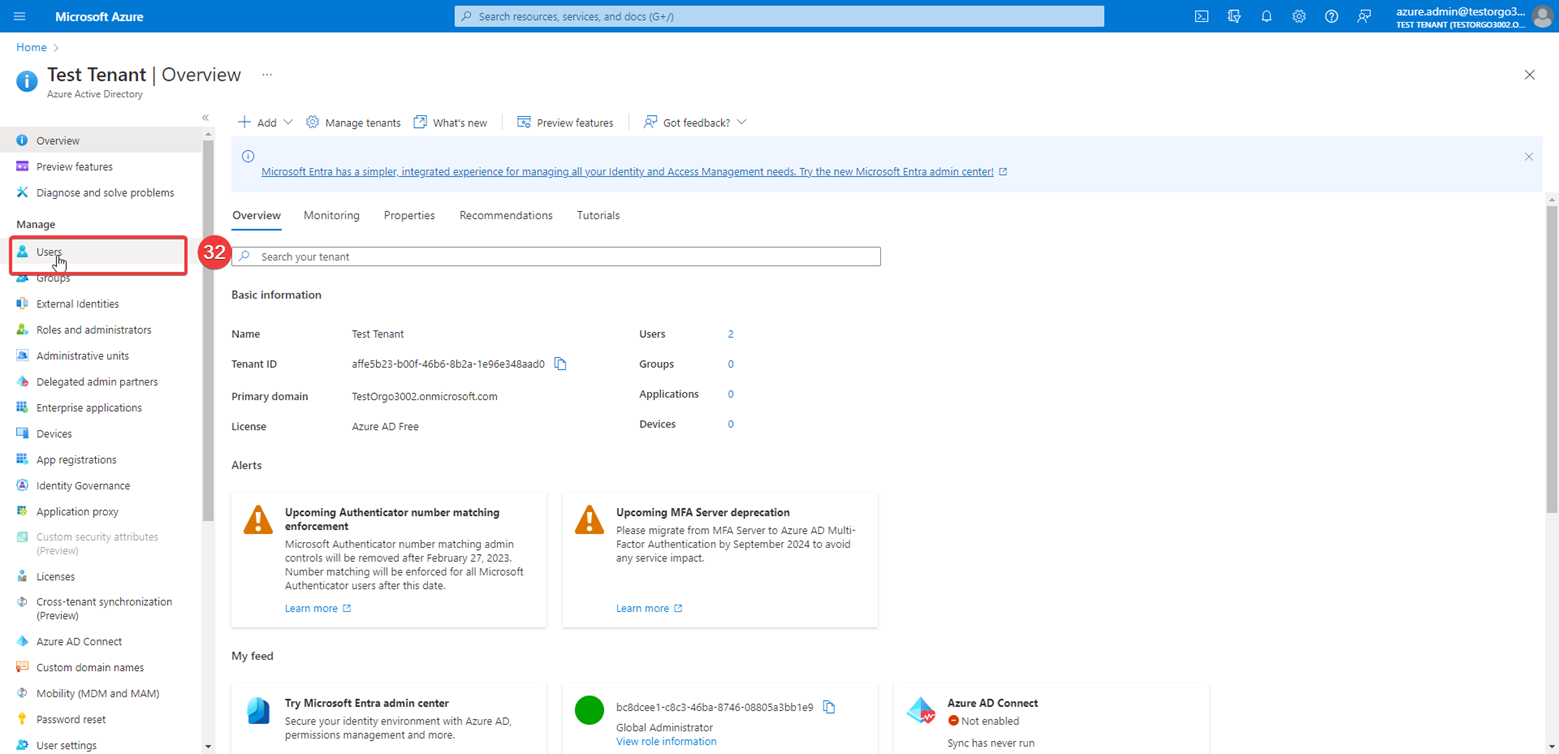
- Click on users
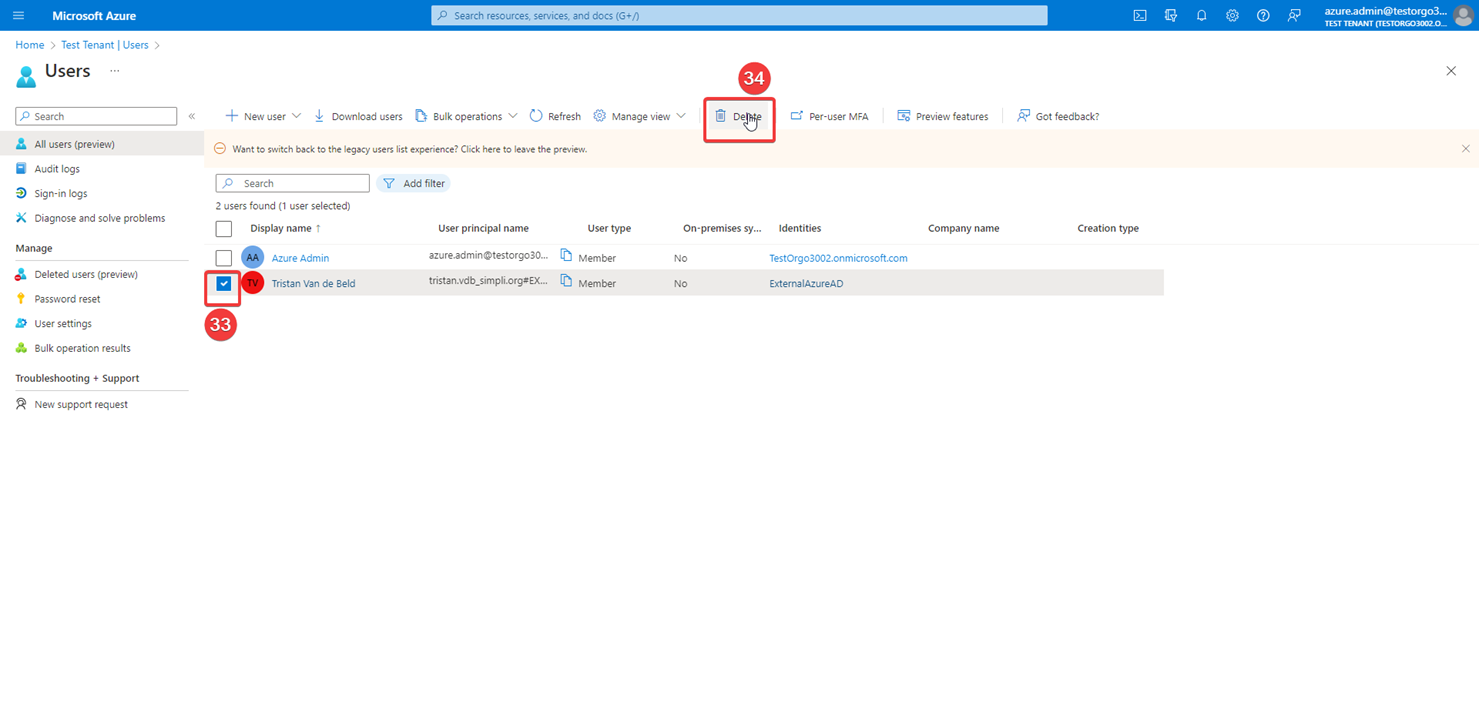
-
Select your user
-
Click delete
-
Ask customer if they want Microsoft 2-factor if not follow these steps (OPTIONAL)
-
Active directory > properties > access management for azure resources (yes) > manage security defaults > click no> click my organisation is getting too many multi-factor authentication sign-up requests (OPTIONAL)
Do these steps with the customer user
-
Go to admin.microsoft.com and sign in with new user
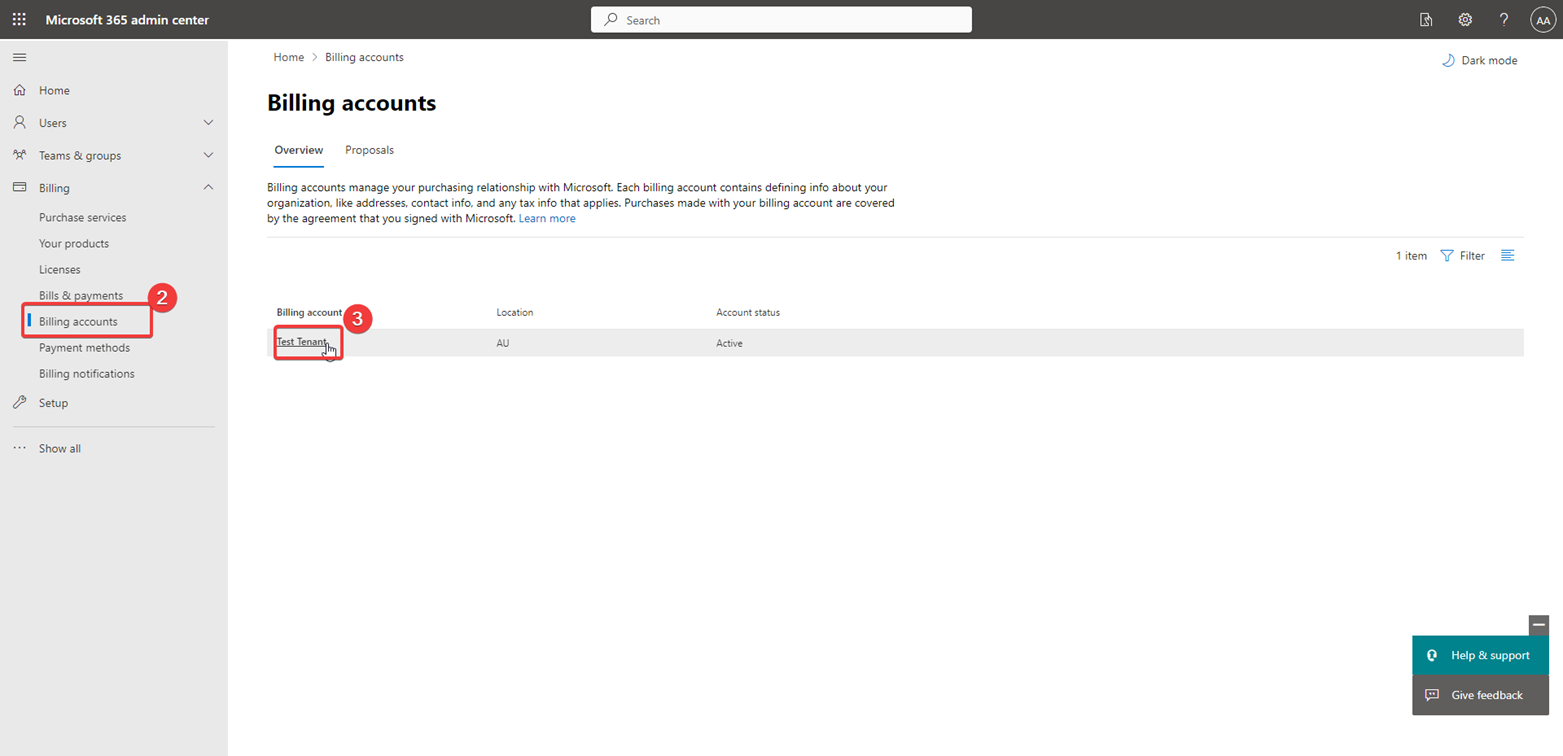
-
Click on billing accounts
-
Click on the new tenant you just created
-
Go to admin.microsoft.com -> billing -> billing account
-
Make sure to fix the information in there and add a tax id if needed
-
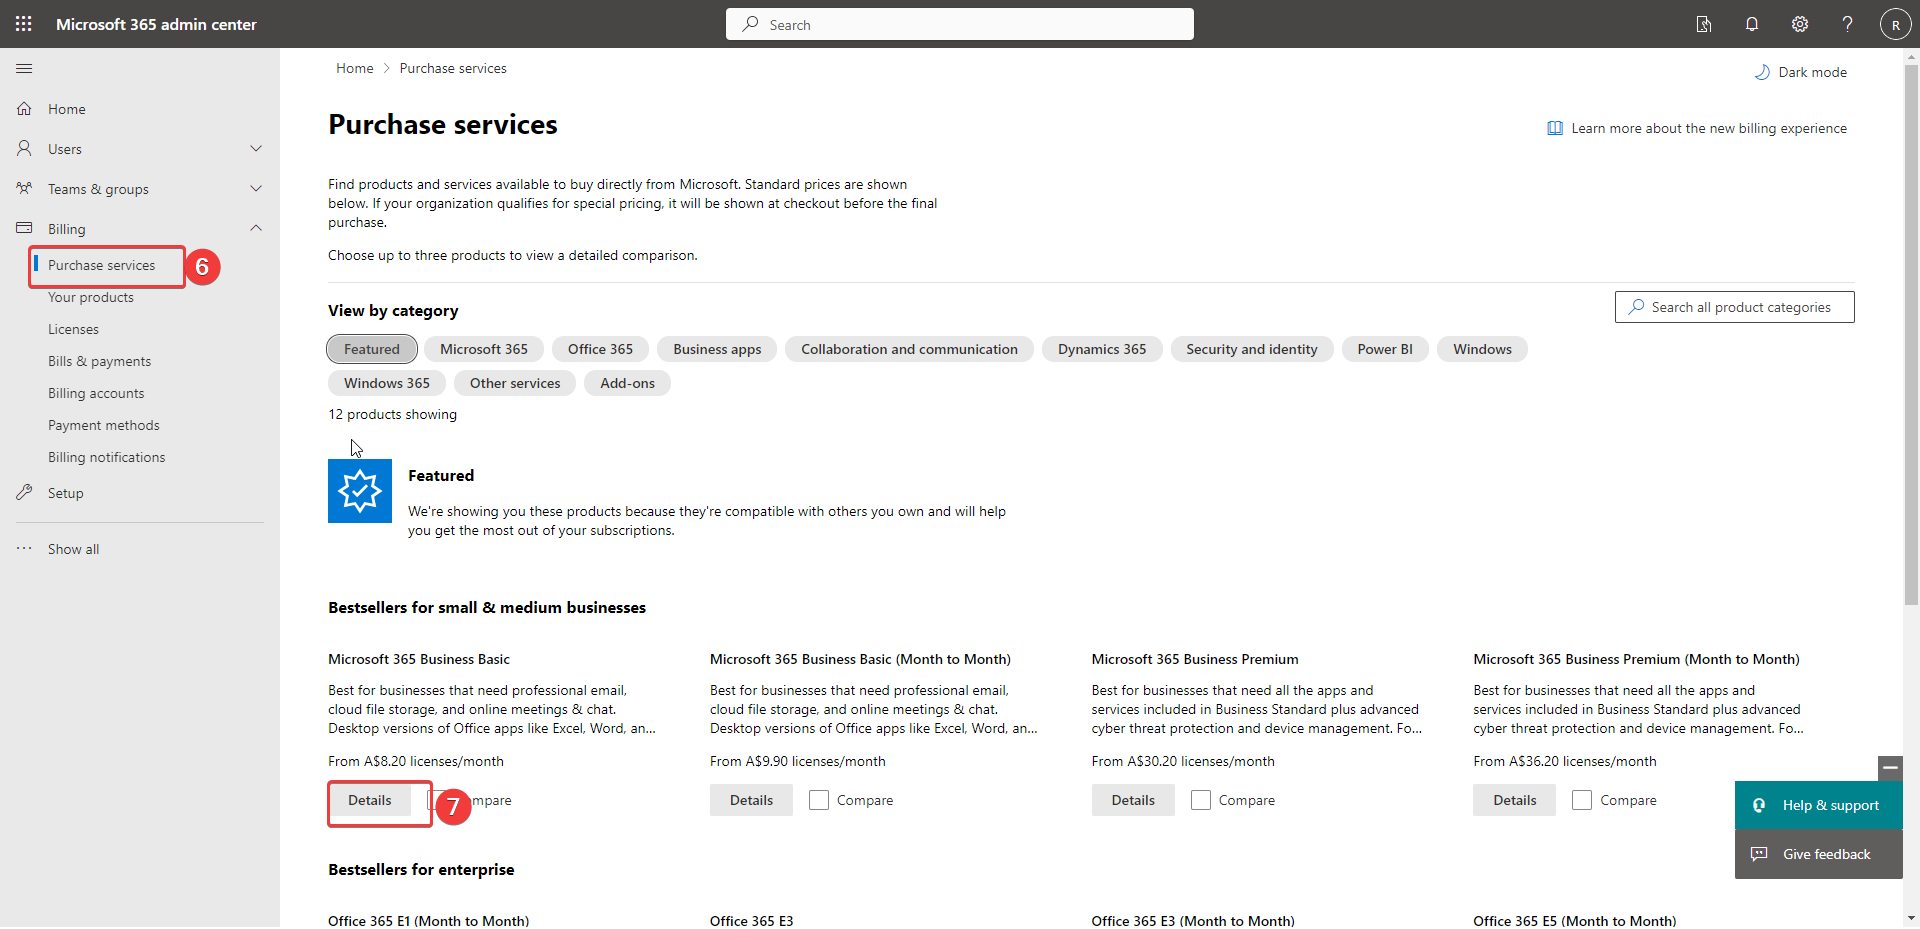
Click on Purchase Services
-
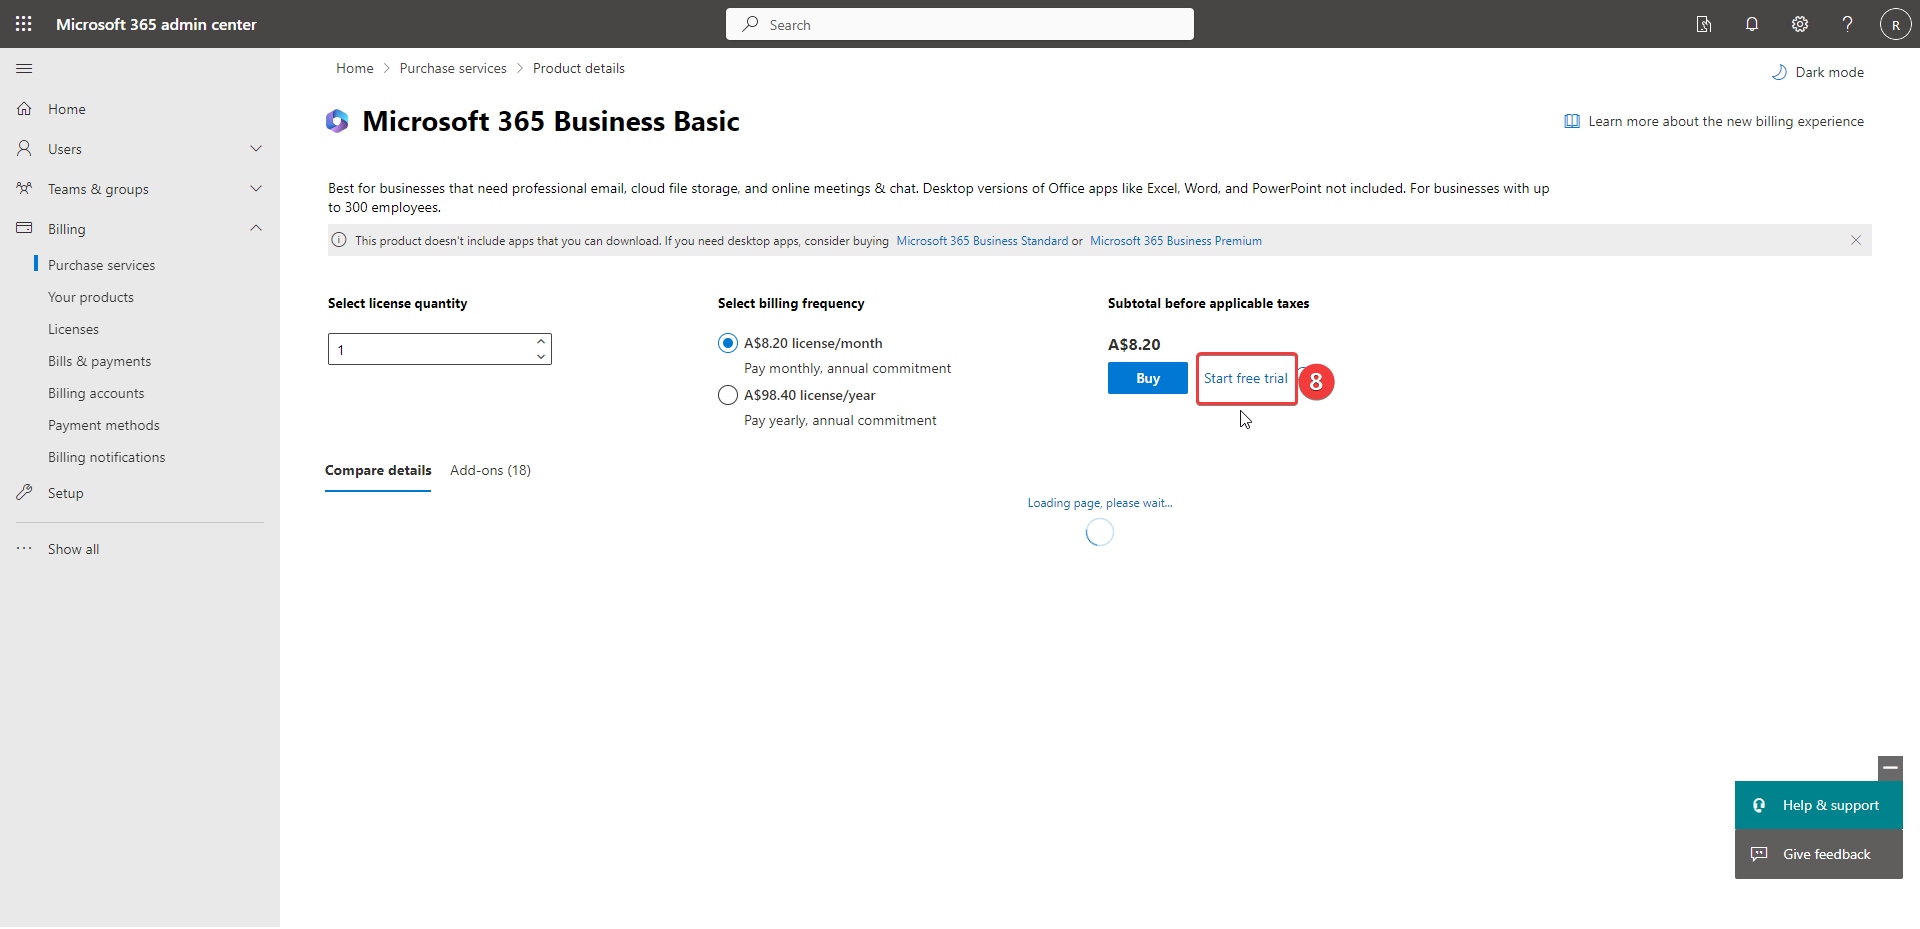
Click on Details
- Click on Start free trial
-
Enter any accessible phone number and put in verification code and click "Start your free trial"
-
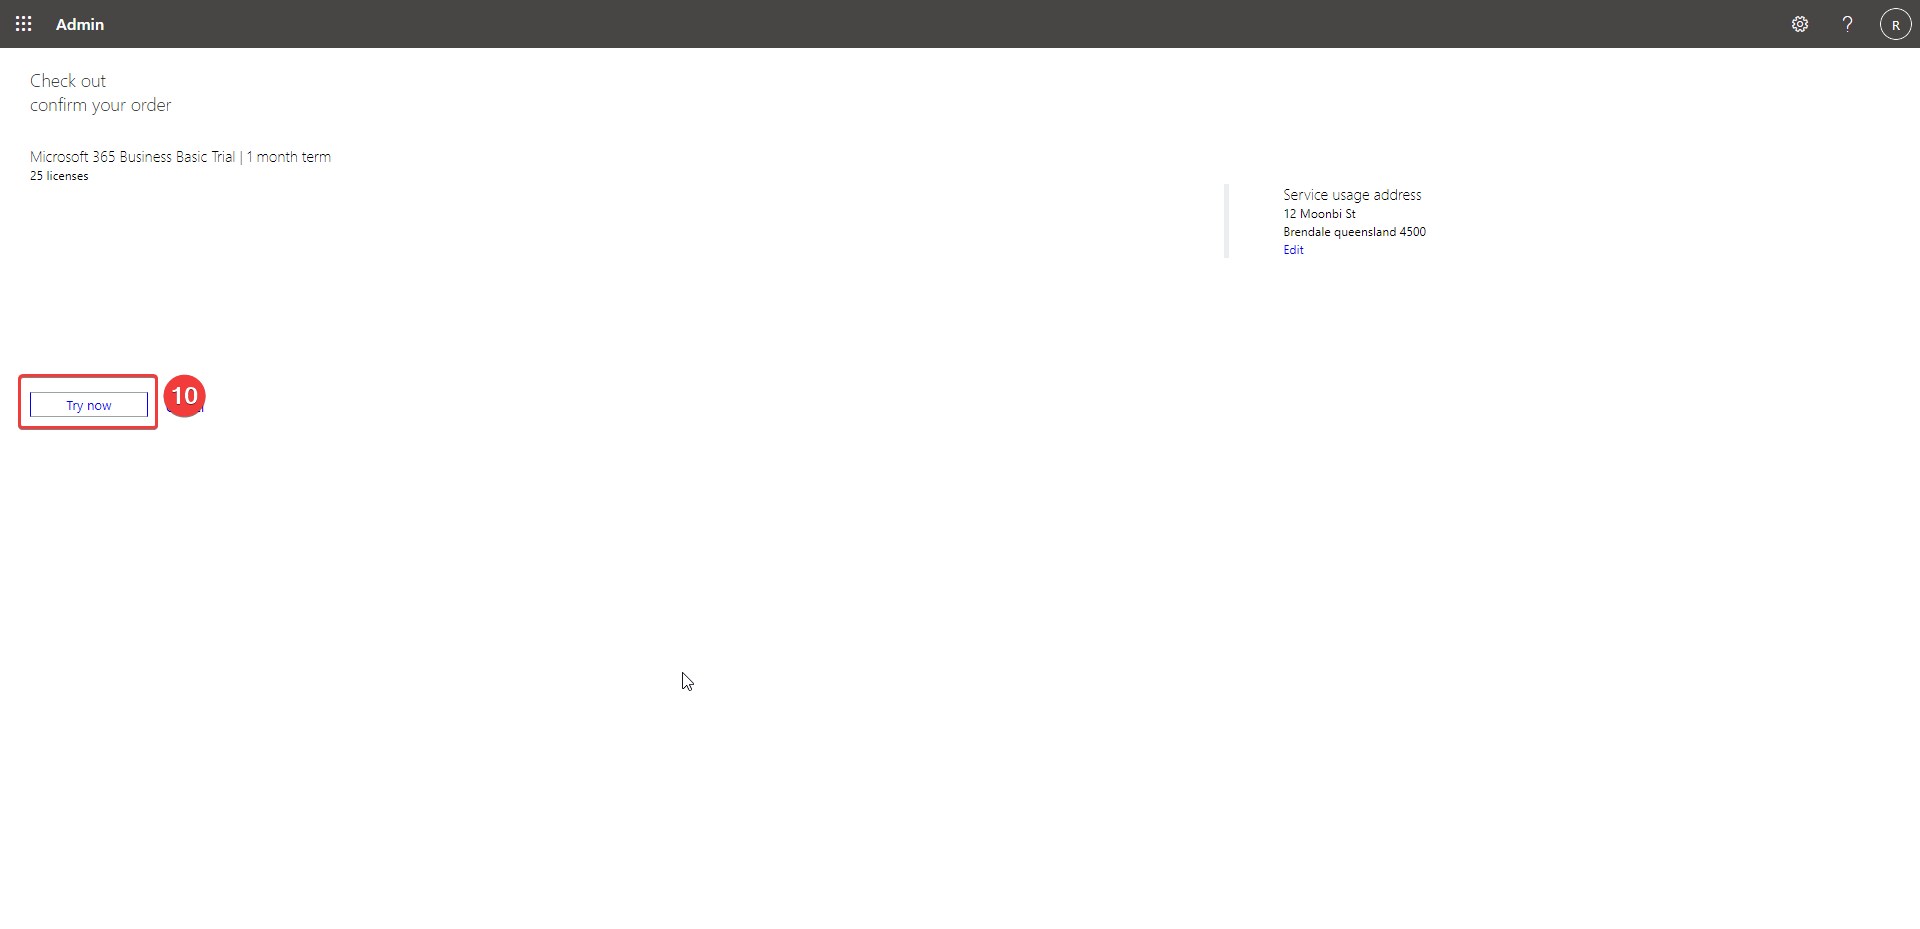
Click try now
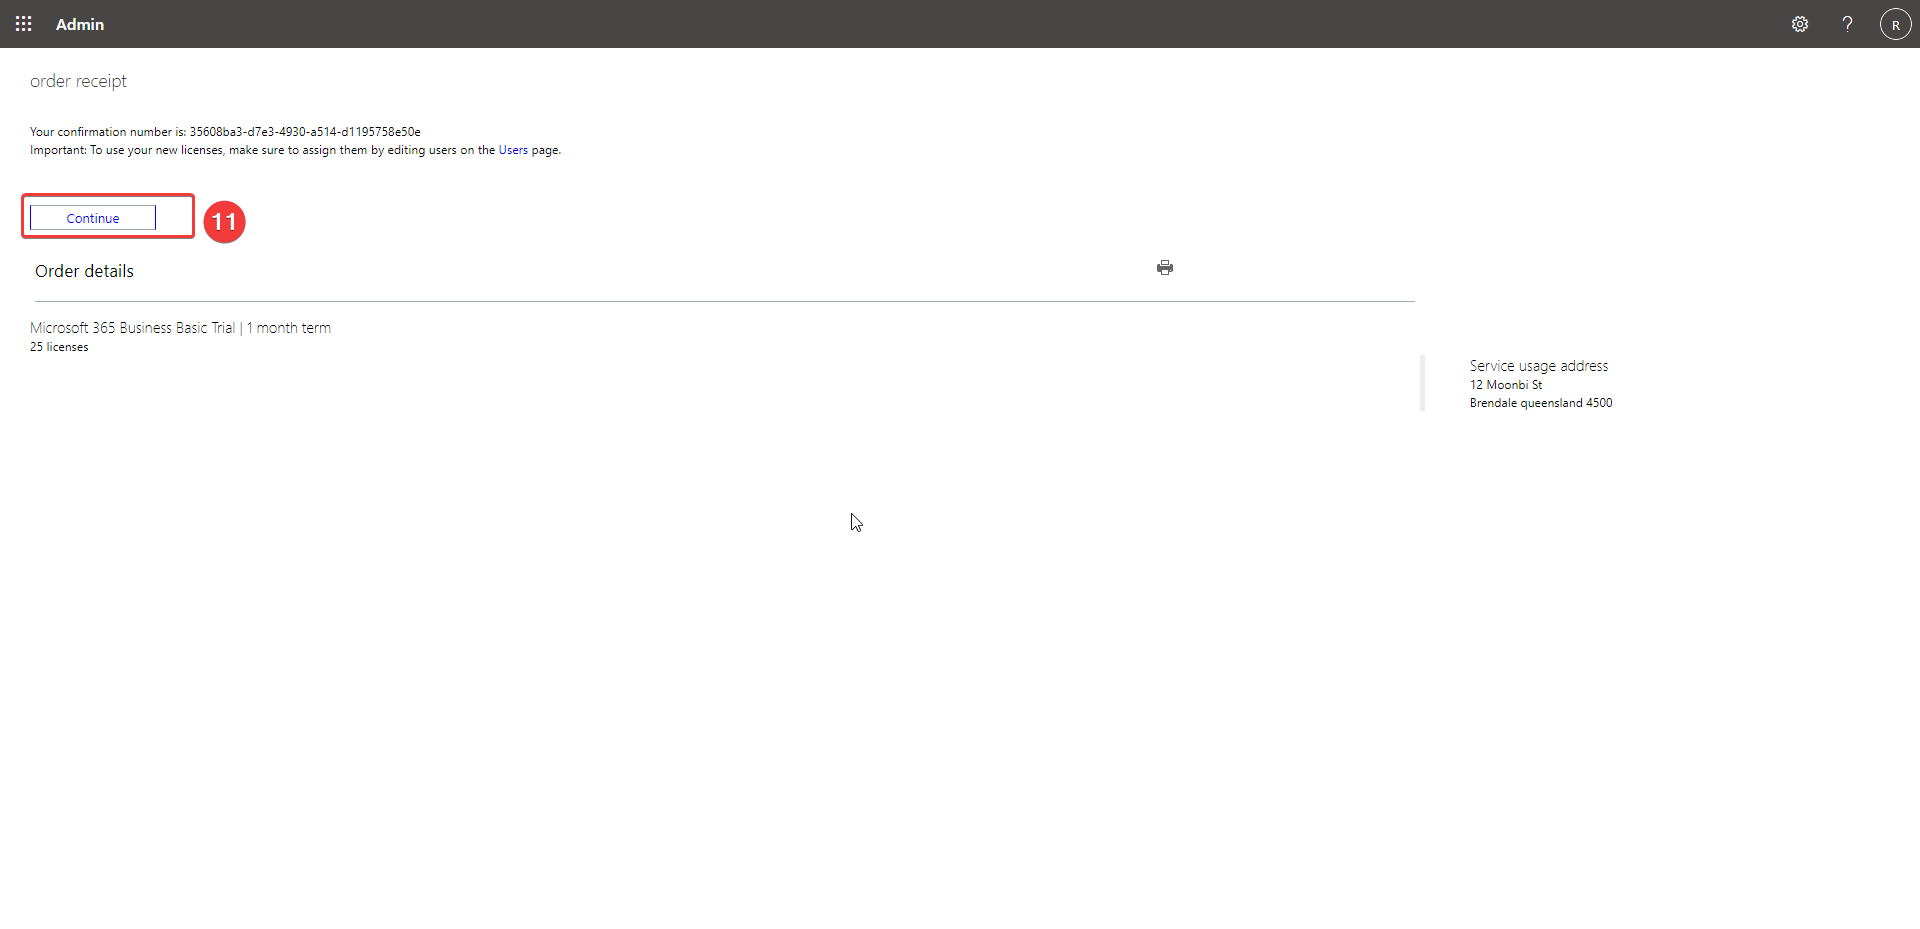
 11. Click continue
Creating Users
-
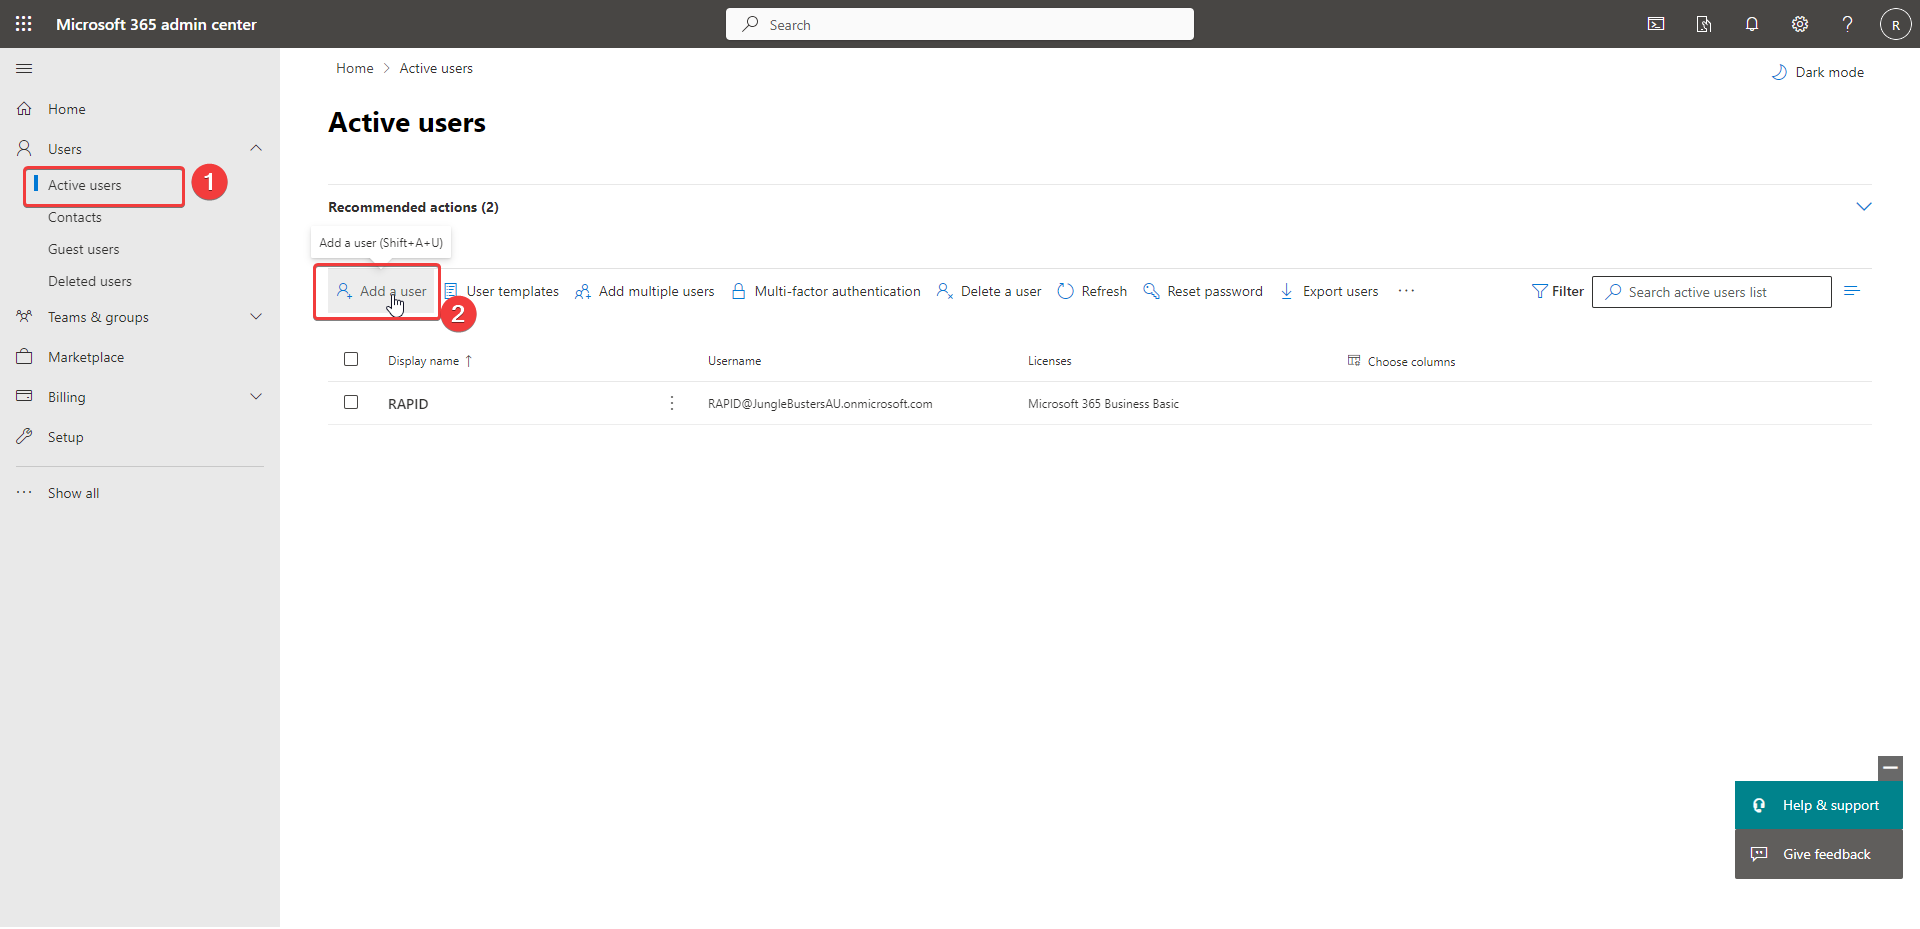
Click Active users under Users
-
Click add user
-
Add in client admin user details and assign
-
Add basic information and click next
-
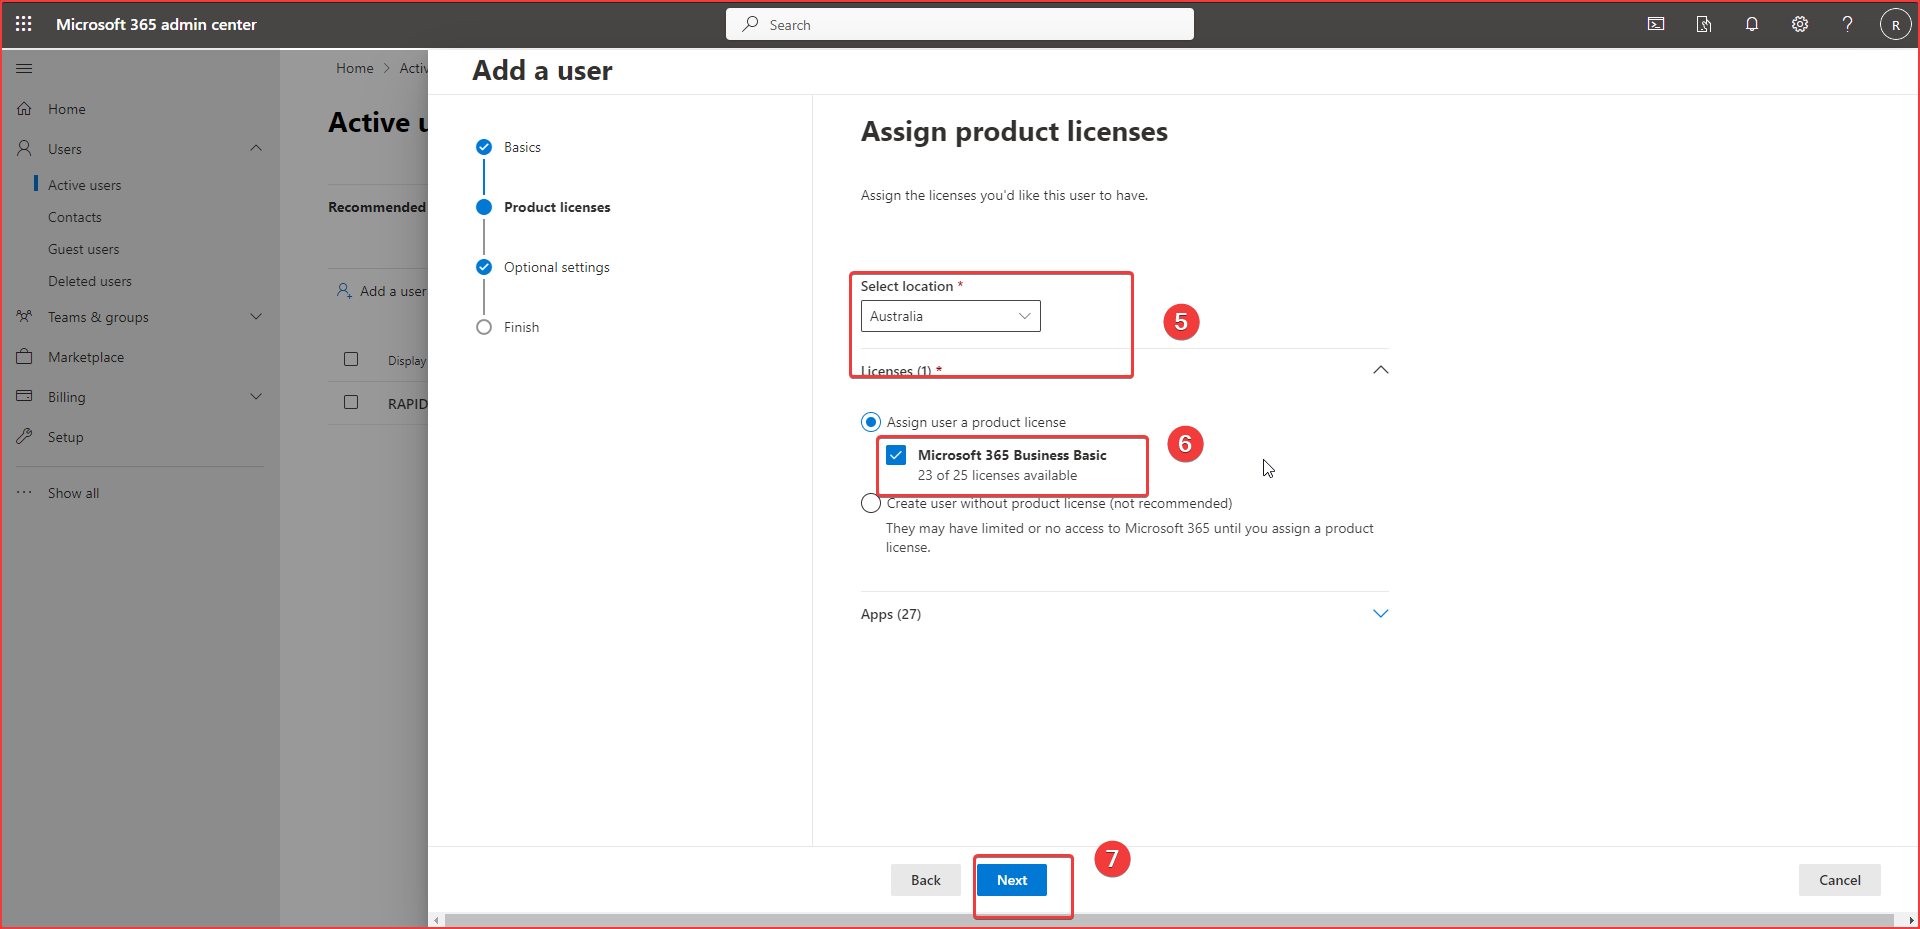
Select Australia
-
Select 365 Business Basic
-
Select Next
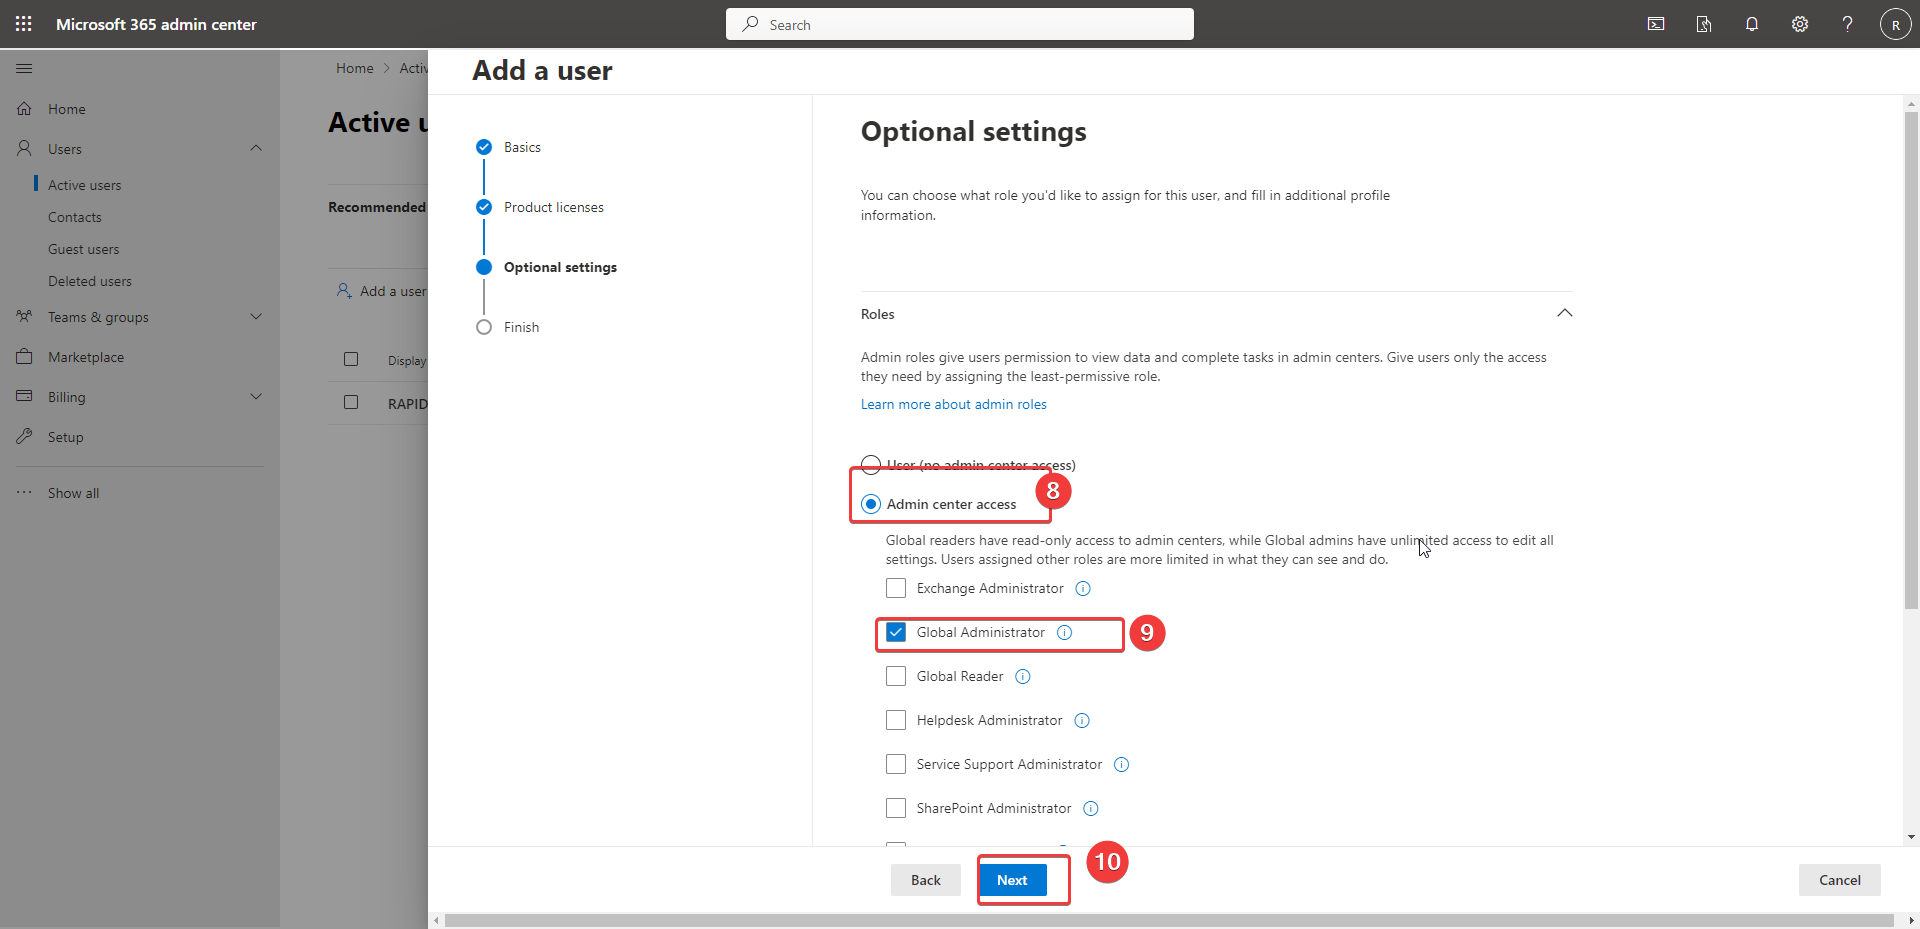
-
Select Admin Center Access
-
Select Global Admin
-
Select next
- Select finish